
Step-by-Step Guide to Setting Up a Medical Alert Watch
You’re about to follow a friendly, detailed guide that walks you through every step to complete your device setup so you can feel confident using it when you need help most. This introduction shows what you’ll need, how the system powers on and connects, and how to add the people who answer at a button press.
We’ll highlight the most important features to check on day one and the key information about accuracy and connectivity that affects real‑world performance. Simple tests, clear contacts, and reliable connections keep the process fast and effective.
By the end, you’ll know how to test safely, use the help function properly, and keep your device working smoothly over time. Each step is written in plain language so you can act with confidence.
Key Takeaways
- Follow a clear step plan to finish your setup quickly.
- Confirm power, connections, and core features before use.
- Add trusted contacts who will respond to an alert.
- Run simple tests to verify accuracy and range.
- Keep the device updated and charged for reliable help.
What you need before you start: power, cellular connection, and user details
Before you start, gather power sources, network details, and contact info so setup goes smoothly. Having these items on hand shortens the process and cuts errors when you add emergency contacts and adjust settings.
Charge the device safely and fully
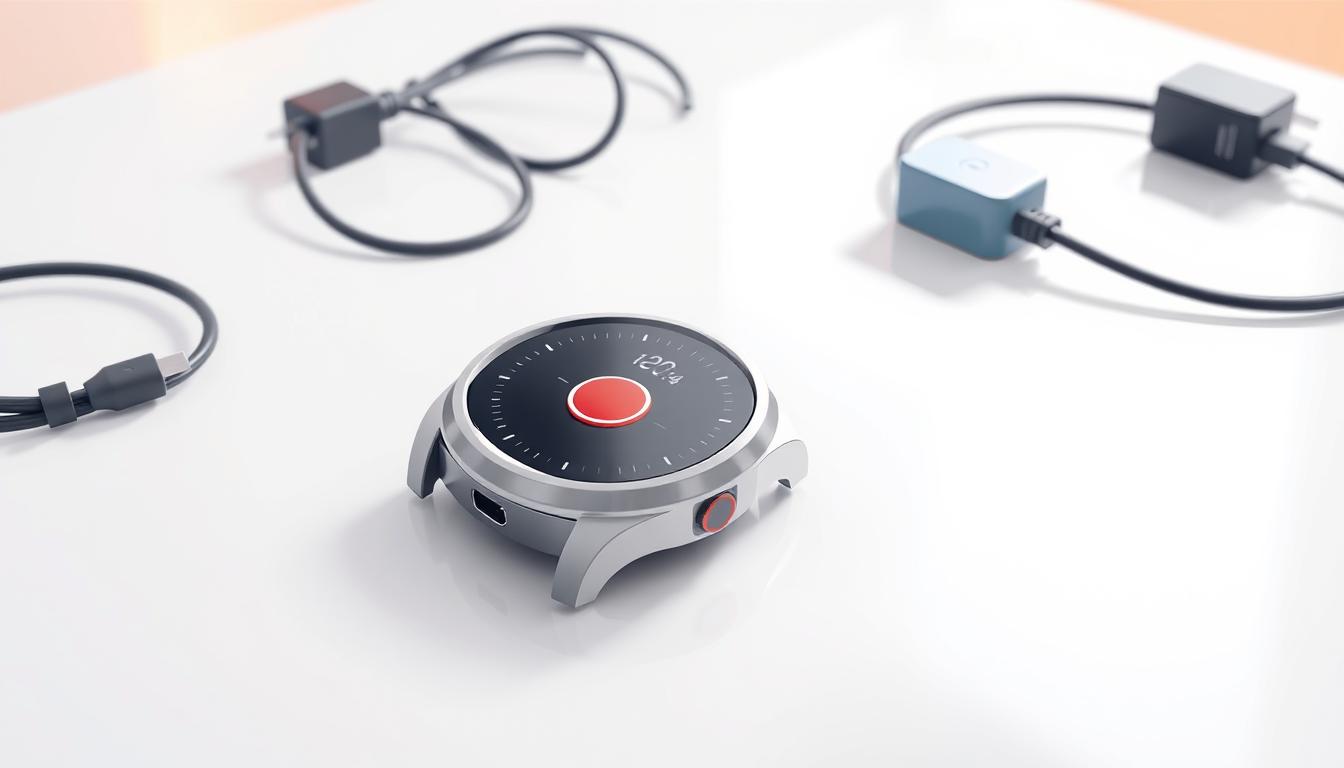
Seat the device on its charging base and connect the USB cable to the AC adapter. Plug into a standard wall outlet that isn’t controlled by a light switch so charging won’t stop unexpectedly.
When the watch is placed correctly, you will hear a voice confirmation. Give it a full charge before continuing and charge daily or whenever the battery is low. Note the battery is not removable.
Confirm cellular signal where you’ll use the watch
Check cellular reception in the rooms and outdoors where you plan to wear the device. A steady connection is required to place calls and send alerts, and service gaps can disrupt location or message delivery.
Have your personal information, the names and phone number of primary and backup contacts, and any account number ready. If you prefer someone else to help, use Remote Programming once the watch is charged and powered on to submit your details and have support add contacts for you.
Medical alert watch setup: your step-by-step path to get connected
Start by powering on the device and checking the Home screen so you know the unit is ready to use.
Power on, basic settings, and first-time checks
Press and hold the Help button on the side until the screen lights up. Glance at time, battery, network bars, and the alert icon to confirm the system status.
Swipe to Settings to adjust sound, display, and other basics. Keep these tweaks small so you can finish the next steps quickly.
Connect to service and confirm network status
Verify the connection and service indicators show active. If you used Remote Programming, confirm the profile synced before testing.
Add and verify emergency contacts
Add primary and backup emergency contacts with full names and phone numbers. Double-check entries; a typo can delay a response when an emergency call matters most.
Turn on fall detection if available and right for you
If your plan includes fall detection, enable it and review sensitivity options. Understand detection helps, but it does not replace pressing the button when you can.
Test an emergency call the safe way
Coordinate a test with your monitoring provider, then place a brief test call per their instructions to avoid a real dispatch. Use helpdesk guidance if you are unsure.
If you need to power down later, swipe to Power Off; otherwise leave the device on and charging so it stays ready.
Using your system in an emergency: help button, timing, and announcements
When seconds count, a clear process for using your help button makes a big difference. Learn the few steps the device follows so you can act confidently if you need help.
Press and hold the Help Button for three seconds
To place an emergency call, press and hold the side button for three seconds. The unit will vibrate and show an alarm status on the screen.
Understand the on-screen alarm status and voice prompts
The device announces, “Your Help Call is in progress…” and repeats that message three times. This short countdown gives you time to confirm the emergency or cancel the call.
How to cancel an unintended call
If the call started by mistake, press the same button again or tap the on‑screen X before the third message finishes. Cancelling stops the system from contacting the response center.
If you don’t cancel, the system automatically places a call to the monitoring center. Be ready to speak and share your location when they connect.
For reliable performance, keep the device charged and within cellular range. Practice how you’ll press the side control so it becomes second nature when every moment matters.
Fall detection essentials: what it can do, what it can’t, and when to press the button
Automatic fall detection adds protection by listening for sudden movement and calling for help when you cannot press the button. When a fall is detected, the device announces “Fall has been detected…” three times and shows an on‑screen alert. You get a short window to cancel by pressing the Help Button or tapping the X.
Common triggers and false alarms to watch for
Everyday actions can set off a false alarm. Abruptly sitting, certain sports moves, or dropping the device may trigger detection.
Cancel quickly if you’re OK to avoid an unnecessary call to the response center.
Movements and conditions that may prevent detection
Some falls aren’t recognized: a slow slide from a chair, lowering yourself gently, or a fall under 20 inches may not register.
High altitude use (above 6,600 ft), users under 4’6″, or under 88 pounds can reduce detection accuracy. The ability to place a help call by pressing the button is not affected.
Always press and press hold the help control when you can. Automated detection supports you, but it does not catch 100% of falls. Review wrist position and daily routines after any missed or false event to improve performance.
Location, accuracy, and connectivity: GPS, Wi‑Fi, and cellular service realities
Location accuracy can vary a lot, so it helps to understand what the system uses to find you.
Your device uses GPS and nearby Wi‑Fi signals to estimate position. In good conditions this often gives accuracy within about 30 feet or less, which helps responders find you faster.
Outdoors, a clear sky view improves GPS performance. Indoors, Wi‑Fi can sharpen the position when satellites are weak.
Tall buildings, heavy tree cover, metal structures, and bad weather can reduce accuracy. Share clear landmarks with the center during a call when you can.
Cellular service quality affects whether your watch can place a call, send location information, or keep a stable link to the monitoring team.
If you see recurring issues, note where and when they happen and contact support with that number and description so they can troubleshoot.
When testing, try several spots: near windows, outside, and in different rooms. This simple check reveals how your environment and conditions influence detection and service.
Keep it reliable: charging, care, updates, and where to get help
A few steady routines for charging and care will protect features and ensure help reaches you fast.
Seat the device on its USB charging base each night and use a wall outlet that isn’t controlled by a switch. Listen for the voice confirmation and fully charge daily or when the battery is low. The battery is not removable.
Keep the system dry and away from dust, heat, cold, and chemicals. Clean with a dry cloth and avoid drops or rough handling so sensors and the button keep working for an emergency call.
Do not open the case. If you need service, call 1-800-906-0872 or use the set‑up videos and phone support at 1-855-272-1010. For fall detection details call 800-800-2537.
Practice a quick press hold so you can trigger help in seconds. Update contact numbers when they change and review feature settings if falls or conditions change.